
Cart
0
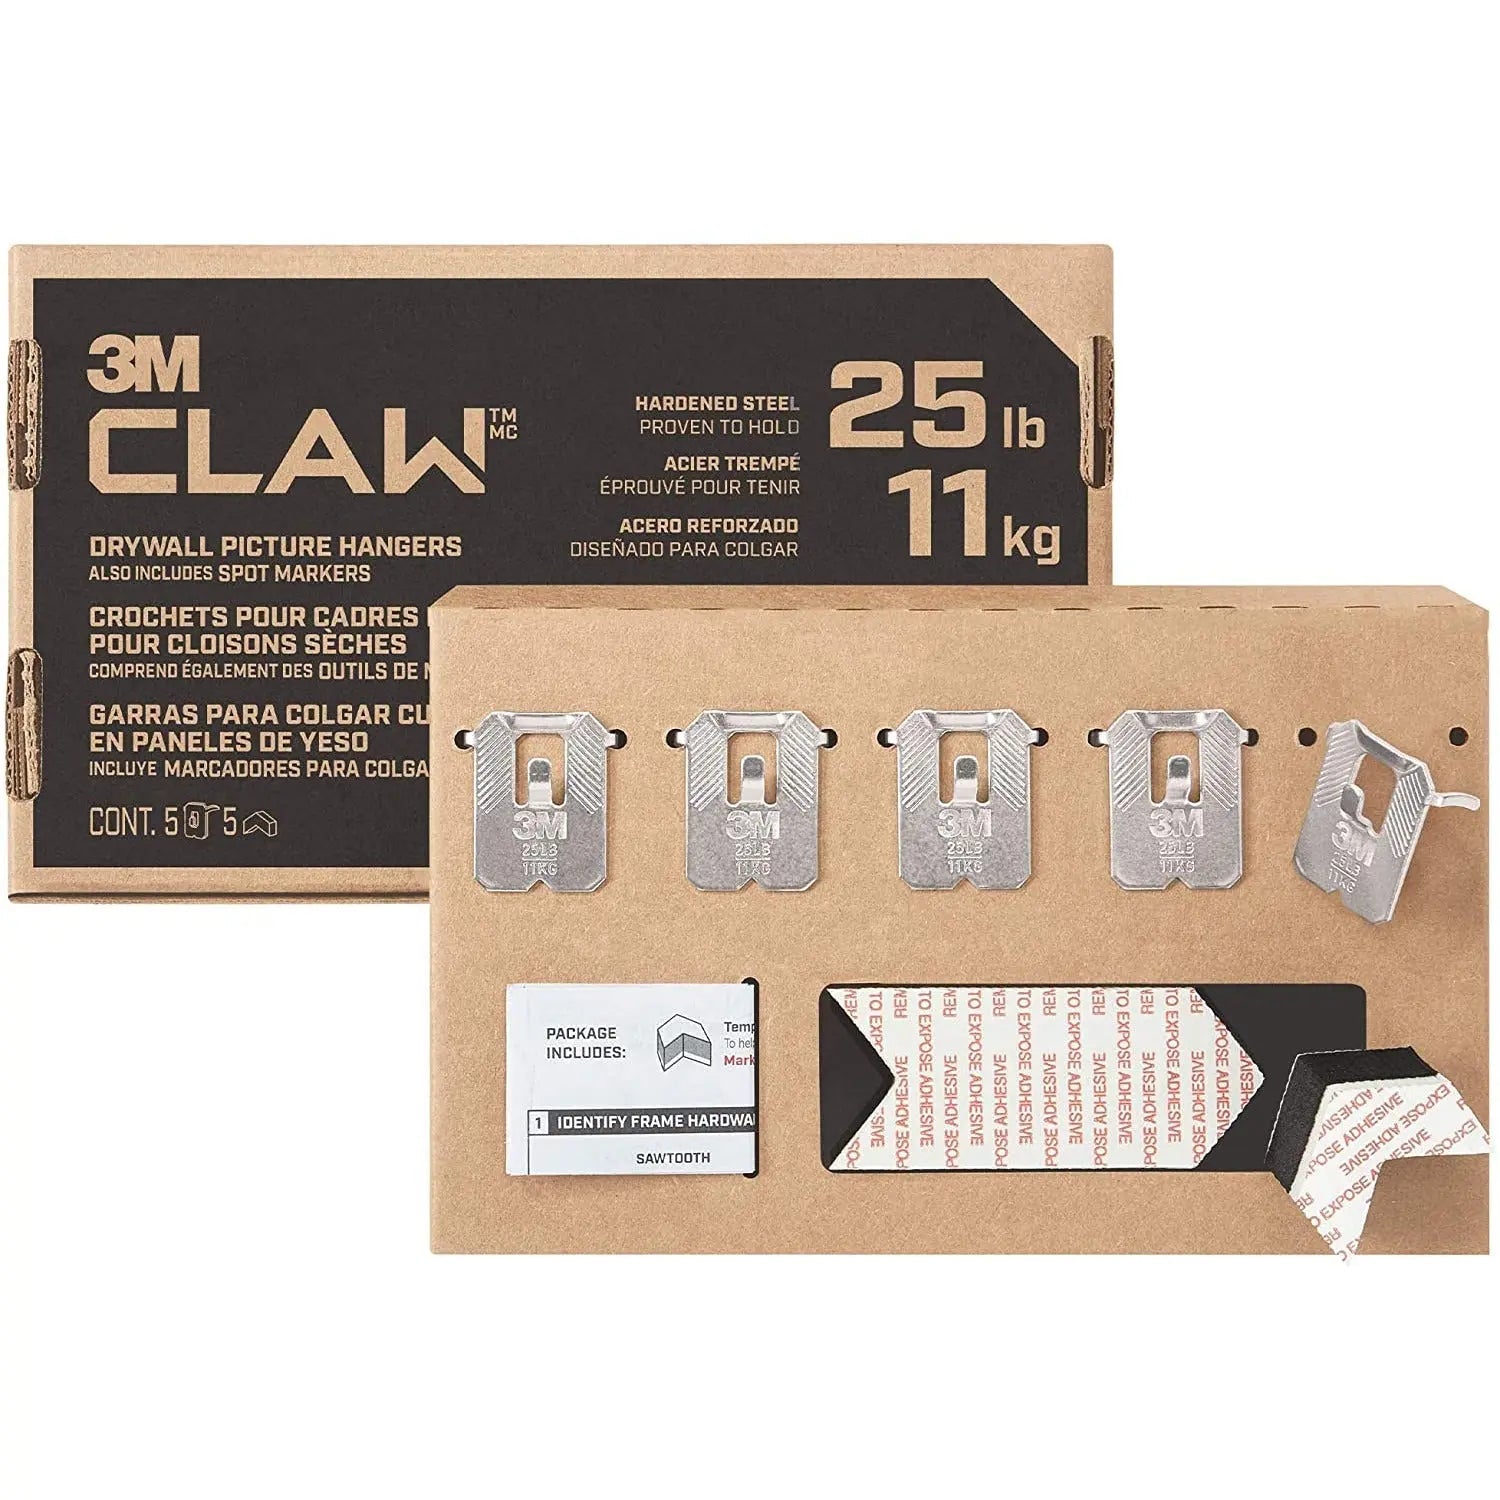
TL;DR: Working out how to hang wall art without damaging walls comes down to using claw-style drywall hangers instead of a fistful of nails — they grip plasterboard directly and don't need a stud behind them. Match the hanger's weight rating to your frame or mirror, use spot markers to mark hook positions accurately before you commit, and reach for a multi-piece kit when you're hanging a mix of frame sizes. The holes these hangers leave are small enough to patch in minutes if you move house or rearrange later.
If you've ever tapped along a wall listening for a stud, only to find your frame doesn't line up where the timber actually is, you already know the usual advice for hanging art doesn't always work in the real world. Australian homes are mostly lined with plasterboard, and studs sit wherever the framing carpenter put them — not wherever your artwork actually needs to go. For renters especially, every extra nail hole is a potential deduction from a bond, which makes finding a low-damage method more than a nice-to-have. The good news is that modern drywall hangers are rated to hold real weight without needing a stud at all, so you can hang a frame, mirror or clock exactly where it looks right rather than where the wall allows.
No-Stud Picture Hangers: How Claw-Style Drywall Hangers Work
Claw-style hangers are built around three or four thin, hardened steel pins arranged in a curved bracket. Instead of driving straight in like a nail, each pin enters the plasterboard at a slight angle, so the pins spread out behind the wall surface as they go. That angled spread is what does the work: rather than relying on one thick nail to bear all the load in a single point, the weight is distributed across several fine points of contact with the gypsum core of the board. The result is a hanger that can carry meaningfully more weight than a single pin or tack, without ever needing to locate a timber stud.
This is the basis of genuinely renter friendly picture hanging. Because each pin is thin, the holes it leaves are barely bigger than a sewing needle, and there's no drilling, no wall plugs and no chasing studs with a detector. The CLAW Drywall Picture Hangers with Spot Markers, No Studs Needed, 25lb rated are a good example of the format: they're rated to hold up to 25lb (roughly 11kg) on plasterboard alone, install with a few light taps of a hammer, and come with placement aids built in, which we'll get to below. For anyone after reliable no stud picture hangers, this style is the starting point for almost every frame, print or light mirror in the house.
Matching the Hanger's Weight Rating to Your Item
The claw design only works as well as its rating, so the most common mistake isn't the hanger — it's using one that's under-specced for the item. Always weigh or reasonably estimate your piece (frame, glass, mat board and all) and choose a hanger rated comfortably above that figure, not exactly at it. A little headroom accounts for knocks, humidity swings that can affect timber frames, and the fact that plasterboard itself varies slightly in density from wall to wall.
| Approximate item weight | Suggested hanger | Typical items |
|---|---|---|
| Up to 5kg (around 10lb) | Single claw-style hanger, lighter end of a multi-piece kit | Small framed prints, postcards, light florals |
| 5–11kg (around 10–25lb) | Claw-style drywall hanger, 25lb rated | Medium frames, framed mirrors, canvas prints |
| 11–34kg (around 25–75lb) | Higher-rated hook from a heavy-duty kit | Large mirrors, statement frames, gallery clusters |
| 34–45kg (around 75–100lb) | Top-rated hook from a multi-weight kit, or two hangers side by side | Large heavy mirrors, oversized framed art |
If you're wondering how to hang a heavy mirror on drywall specifically, this is where the table matters most: mirrors carry glass and often a heavier frame than a print of the same size, so it's easy to underestimate the total weight. For anything in the upper half of that table, it's worth using two hangers spaced apart rather than a single central point — it steadies the piece and halves the load on each hanger.
Using Spot Markers to Plan an Even Gallery Wall Layout
Getting a single frame level is easy enough with a spirit level. Getting five or six frames level, evenly spaced and centred as a group is where most gallery walls go wrong — and where most extra holes get made. Spot markers solve this by letting you plan before you touch a hammer. Hold the frame in position with a helper or painter's tape, mark where the hanging point sits on the back of the frame, then transfer that point to the wall using a peel-and-stick spot marker rather than a pencil dot you might smudge or misjudge.
Once every frame in the layout has its spot marked, step back and check spacing and alignment across the whole wall before installing a single hanger. This is especially useful for symmetrical or grid-style layouts, where even a centimetre of drift on one frame throws off the whole arrangement. It's also the same logic worth applying if you're adding a wall clock into the mix — our guide on how to choose a wall clock covers sizing a clock face against surrounding frames so it reads as part of the layout rather than an odd one out.
Multi-Piece Kits for a Mix of Frame Sizes
Most households don't hang one type of item — a typical gallery wall or living room combines small prints, a mid-sized mirror, maybe a woven hanging and a heavier statement frame, all at different weights. Buying single hangers one at a time for each of these gets fiddly fast, which is where a multi-piece kit earns its keep. The Heavy Duty Picture Hanging Kit, 120 Pieces, Multiple Weight Ratings (10-100lb) covers a spread of weight ratings from 10lb through to 100lb in one box, so lightweight prints, mid-weight mirrors and heavier framed pieces can all be hung from the same kit without guessing which pack to buy next.
Having a range of ratings on hand also makes it easier to follow the "size the hanger to the item, not the other way around" rule from the table above, since you're not tempted to reuse a lighter hanger just because it's the one already open. Once your artwork is up, it's worth thinking about what sits beneath it too — if the gallery wall sits above a console table or sideboard, our guide on how to style a console table has ideas for layering decor underneath so the whole vignette feels considered rather than just a wall of frames.
Patching Small Holes When You Move a Piece
Because claw-style pins are so fine, patching them is a genuinely quick job rather than a wall-filling project. Once the frame is off and the hanger removed, press a small amount of lightweight spackle or wall filler into each pinhole with a fingertip or a flat scraper, let it dry, then lightly sand it flush with fine sandpaper. On most painted plasterboard this is barely visible without a touch-up, and where a wall is due to be repainted or a lease is ending, a quick dab of matching paint over the patched spot finishes the job in seconds rather than the sanding, filling and re-priming that larger nail or screw holes usually need. This is the main reason no stud picture hangers suit renters so well: rearranging a gallery wall, or taking everything down at the end of a lease, doesn't leave a wall covered in holes to explain.
Frequently asked questions
Do I need to find a wall stud to hang picture frames securely?
No. Claw-style drywall hangers are designed to hold weight directly in plasterboard using multiple angled pins, so there's no need to locate a stud. They're rated for most frames, prints and light-to-medium mirrors without any extra wall reinforcement.
How much weight can a claw-style drywall hanger hold?
It depends on the hanger, but common ratings run from around 10lb up to 100lb across a multi-piece kit. Always check the printed rating on the packaging and choose one rated above your item's actual weight for a safety margin.
How do I hang a heavy mirror on drywall without it falling?
Weigh the mirror including its frame and glass, then choose a hanger rated well above that figure. For larger or heavier mirrors, use two hangers spaced apart rather than one central point to spread the load evenly.
What are spot markers and how do they help with a gallery wall?
Spot markers are small peel-and-stick dots that mark exactly where a hanger needs to go, based on the hanging point on the back of the frame. Marking every frame's position first lets you check spacing and alignment across a whole layout before installing any hangers.
Will hanger holes need patching before I repaint or move out?
The holes left by claw-style pins are very small, so patching is quick. Press a little wall filler into each hole, let it dry, sand lightly, then touch up with matching paint if needed — a small job compared with filling larger nail or screw holes.