Cart
0
Quick answer: Work in four passes — clear and deep clean surfaces, inspect timber and metal for winter damage, restore lighting and irrigation, then set up furniture and soft furnishings. Start in late winter, about three to four weeks before you actually want to use the space, because cleaning and any repairs need dry days to complete.
TL;DR: Australian spring starts on 1 September, and the mistake most people make is starting the week they want to use the deck rather than the month before. A proper reset runs in a fixed order: clear everything out, clean hard surfaces top-down, inspect for the specific damage winter causes (mould on shaded timber, rust at fixings, blocked drainage, perished seals), then restore the systems that went dormant — solar lights that have been in shade for months and irrigation timers with flat batteries. Furniture and cushions go back last, once surfaces are properly dry. Solar lighting in particular needs a head start: a solar unit that has sat in winter shade needs several full charge cycles before it holds a night.
Key facts
- Australian spring begins on 1 September; a full outdoor reset needs three to four weeks of lead time.
- Solar lights typically need 4 to 6 hours of direct sunlight to fully charge, and deliver 6 to 10 hours of light from that charge.
- IP65 is the practical minimum weather rating for anything permanently outdoors in Australia.
- Timber decks should be fully dry before oiling — surface-dry is not the same as dry.
- Work top-down when cleaning, so debris falls onto surfaces you have not yet done.
Step 1: Clear It Completely
Take everything off the deck or patio. Furniture, pots, the barbecue, the bin that migrated out there in June. You cannot assess or clean a surface you cannot see, and winter damage hides underneath objects that have not moved in months.
Check what has been living under the furniture. Pot bases and furniture feet trap moisture against the surface all winter. This is where you find the worst staining, the softest timber and the start of rust on metal legs.
Sort as you go, rather than putting it all back later. Anything broken, faded past saving or unused for two summers does not need to return. Our guide on how to keep an outdoor entertaining area warm in winter covers what is worth storing versus keeping out year-round.
Step 2: Clean From the Top Down
Gravity decides the order. Anything you clean before the thing above it will need doing twice.
Start with the roof line, pergola or shade sail. Clear leaves and check for sagging or pooling. A shade sail that has held water all winter has usually stretched.
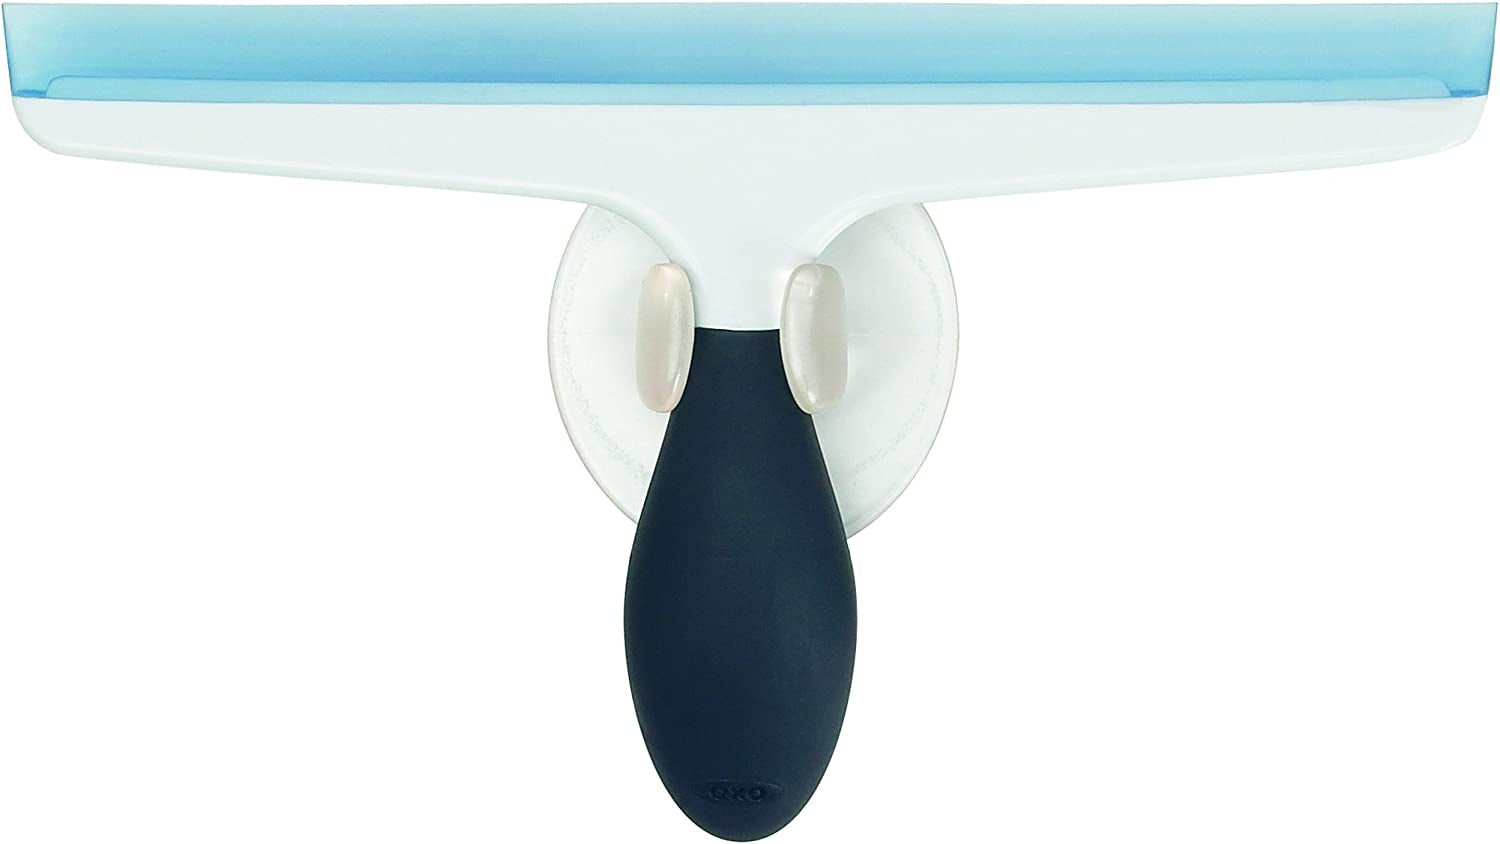
Then walls, railings and glass. Balustrades and glass panels collect a winter film that is mostly organic. An all-purpose squeegee with a flexible blade handles glass balustrades and outdoor windows without streaking, and its suction cup means it stores on the wall where the job is rather than in a cupboard indoors.
Then the floor. Sweep thoroughly before any water goes down.
Treat mould and lichen properly, not aggressively. Shaded timber and unsealed concrete grow mould over an Australian winter. High-pressure washing on softwood decking can tear the grain and leave a furred surface that weathers faster afterwards. Use the lowest effective pressure and keep the nozzle moving.
Then let it dry properly. This is the step people rush. Timber that feels dry on the surface can still hold moisture, and oil or stain applied over that will not cure correctly. Give it several genuinely dry days.
Step 3: Inspect for the Damage Winter Actually Causes
Winter damage in Australian outdoor areas is predictable, which makes it quick to check.
Timber: press a screwdriver into any board that looks dark or feels soft, particularly where a pot has sat. If it sinks easily, that board is going, not weathering.
Fixings and metal: look at screw heads, bracket feet and the underside of metal furniture. Rust starts at fixings and at any chip in a powder-coated finish. Coastal properties will see this fastest — salt finds every break in a coating.
Drainage: pour a bucket of water across the deck or patio and watch where it goes. Water that sits rather than runs is what causes the rot you will be fixing next winter.
Seals and covers: perished rubber, split covers and cracked plastic feet all fail in the same season they start looking tired.
Anything electrical stays with an electrician. Cleaning fittings and replacing globes is household work. Installing an outdoor power point, running a new circuit, or altering hardwired outdoor lighting is electrical work and in Australia must be done by a licensed electrician.
Step 4: Wake the Lighting Up
Lighting is the step that changes how much the space actually gets used, and solar needs the most lead time.
Solar units need charge cycles, not just sunlight. A solar light that has spent winter in shade or storage will not perform on its first night out. Put units in their sunniest position for several days before you judge them. As a reference, a solar fairy string light set rated at 20 m with 200 LEDs states it needs about 6 hours of sun to deliver 6 to 7 hours of light from an 800 mAh battery, with 8 lighting modes and an IP65 rating.
Clean the solar panel, not just the light. A winter film on the panel is the single most common reason a solar light underperforms. It takes seconds and often restores full run time.
Check the panel's aim. The panel needs direct sun, which is not the same place the light needs to be. Units where the panel separates from the fitting give you far more freedom here.
Layer the lighting rather than relying on one type. Pathway lighting, ambient string lighting and functional security lighting do different jobs:
| Lighting type | Job | What to check |
|---|---|---|
| Pathway / marker | Safe movement after dark | Height, spacing, charge time |
| String / fairy | Ambience over a seating area | Run length, mounting points, modes |
| Motion sensor | Security and hands-full access | Detection range and angle |
For pathway lighting, a set like these solar pathway lights publishes the numbers that matter: 200 lumens, 70 cm tall, IP65 rated, with a 4 to 6 hour charge giving up to 10 hours of light.
For functional lighting near a door, a solar motion sensor wall light with a 120-degree sensor angle and 8 to 10 m detection range covers the approach to a door without running all night. Its three modes let you choose between motion-only and a dim-until-triggered setting, which is the useful one over a seating area.
A simpler 20 m solar fairy light with 8 modes covers the ambient layer along a fence or pergola.
Our guides on choosing outdoor string lights and outdoor motion sensor lights go deeper on each.
Step 5: Restart Irrigation Before You Need It
Watering timers fail quietly over winter. Batteries flatten, seals perish and a timer that worked in March will not necessarily fire in October — you just will not find out until something dies.
Test the full cycle manually rather than trusting the display. Run each zone and physically watch water come out.
Reset the schedule for the season ahead, not the one just gone. Our guide on how to choose a garden watering timer covers programming and the failure modes worth knowing.
Step 6: Set Up, in the Right Order
Furniture goes back only once surfaces are fully dry, or you will trap moisture under the feet and start the next cycle of damage immediately.
Place for shade first, then for view. In Australia the useful outdoor hours in spring and summer are governed by where the sun is at 4pm, not by where the nicest outlook is. Sit in the space at that hour before committing to a layout.
Lift pots off the surface. Pot feet or a simple stand break the moisture bridge that causes most deck staining.
Soft furnishings last. Cushions and throws go out once everything else is done and dry. Our cushion size and layering guide covers proportions that also work on outdoor seating.
Check indoor humidity has come down too. If you have been drying washing inside all winter, spring is when to stop. Our guide on stopping condensation and damp covers the changeover.
A Realistic Timeline
| When | Do this |
|---|---|
| 4 weeks out | Clear everything, assess damage, order replacements |
| 3 weeks out | Deep clean, then let surfaces dry fully |
| 2 weeks out | Repairs, oiling or sealing; start charging solar units |
| 1 week out | Install and position lighting; test irrigation |
| The week itself | Furniture, pots, cushions, and use it |
Ready to Start?
Do it in order and the space is ready before the first warm weekend rather than during it. The two steps worth starting earliest are drying time after cleaning and charging solar lighting — both take days, not hours, and both are what people run out of time on. Browse the full Pattan Australia range for the lighting and outdoor pieces that finish the job.
Frequently asked questions
When should I start getting my outdoor area ready for spring?
Start in late winter, roughly three to four weeks before you want to use the space. Australian spring begins on 1 September. The lead time exists because cleaning needs dry days to follow it, any oiling or sealing needs fully dry timber, and solar lighting needs several charge cycles before it performs.
How long do solar lights take to charge?
Most solar garden lights need 4 to 6 hours of direct sunlight for a full charge, which typically delivers 6 to 10 hours of light. A unit that has been stored or sitting in shade over winter will need several full cycles before it holds a whole night, so set them out well before you need them.
Why are my solar lights not working after winter?
The most common cause is a dirty solar panel, since a winter film blocks charging and cleaning it often restores full performance. The next most common causes are the panel sitting in shade rather than direct sun, and an aged rechargeable battery that no longer holds charge.
Should I pressure wash my deck?
Use the lowest effective pressure and keep the nozzle moving. High pressure on softwood decking tears the grain and leaves a furred surface that weathers faster afterwards. Sweep first, treat mould with an appropriate cleaner, and let the timber dry fully before oiling or sealing.
What IP rating do outdoor lights need in Australia?
IP65 is the practical minimum for anything permanently outdoors, meaning it is dust-tight and protected against water jets. Lower ratings suit covered areas only. Note that on some solar string lights the light itself is weatherproof while the battery box is not, so check both.
In what order should I clean an outdoor area?
Work top-down: shade sails or pergola first, then walls, railings and glass, then the floor last. Cleaning in any other order means debris falls onto surfaces you have already done. Sweep before applying water, and allow full drying time before furniture returns.